This is default featured slide 1 title

Go to Blogger edit html and find these sentences.Now replace these sentences with your own descriptions.

This is default featured slide 2 title

Go to Blogger edit html and find these sentences.Now replace these sentences with your own descriptions.

This is default featured slide 3 title

Go to Blogger edit html and find these sentences.Now replace these sentences with your own descriptions.

This is default featured slide 4 title

Go to Blogger edit html and find these sentences.Now replace these sentences with your own descriptions.

This is default featured slide 5 title

Go to Blogger edit html and find these sentences.Now replace these sentences with your own descriptions.

Showing posts with label Collection. Show all posts

sharkPy - NSA Tool to Dissect, Analyze, and Interact with Network Packet Data using Wireshark and libpcap capabilities


A python module to dissect, analyze, and interact with network packet data as native Python objects using Wireshark and libpcap capabilities. sharkPy dissect modules extend and otherwise modify Wireshark's tshark. SharkPy packet injection and pcap file writing modules wrap useful libpcap functionality.

SharkPy comes with six modules that allows one to explore, create, and/or modify packet data and (re)send data over network, and write (possibly modified) packets to a new pcap output file. This is all done within python program or interactive python session.
  1. sharkPy.file_dissector -- dissect capture file packets using Wireshark's dissection libraries and present detailed packet dissections to caller as native Python objects.
  2. sharkPy.wire_dissector -- capture packets from interface and dissect captured packets using Wireshark's dissection libraries. Presents packets to callers as native Python objects.
  3. sharkPy.file_writer -- write (possibly modified) packets to a new output pcap file. For example, one can dissect packet capture file using sharkPy.file_dissector, create new packets based on the packets in the dissected file, and then write new/modified packets to an output pcap file.
  4. sharkPy.wire_writer -- write arbitrary data (e.g. modified packets) to specified network interface using libpcap functionality. Currently, sharkPy users are responsible for correctly building packets that are transmitted using this module's functionality.
  5. sharkPy.utils -- a set of utility functions
  6. sharkPy.protocol_blender -- protocol specific convenience functions. Currently contains functions for ipv4 and tcp over ipv4.
SharkPy is provided "as-is" with NO WARRANTIES expressed or implied under GPLv2. Use at your own risk.

Design Goals
  1. Deliver dissected packet data to callers as native python objects.
  2. Provide functionality within a Python environment, either a python program or interactive python session.
  3. Make commands non-blocking whenever reasonable providing command results to caller on-demand.
  4. Be easy to understand and use assuming one understands Wireshark and python basics.
  5. Pack functionality into a small number of commands.
  6. Build and install as little C-code as possible by linking to preexisting Wireshark shared libs.

Why sharkPy?
SharkPy has a long-term goal of segmenting Wireshark's incredible diversity of capabilities into a set of shared libraries that are smaller, more modular, more easily compiled and linked into other projects. This goal seperates sharkPy from other similar efforts that endeavor to marry Wireshark/tshark and Python.
The first step is provide Wireshark/tshark capabilities as Python modules that can be compiled/linked outside of Wireshark's normal build process. This has been achieved at least for some linux environments/distros. Next step is to expand to a broader range of linux distros and Windows improving stability along the way. Once this is completed and sharkPy's capabilities are similar to those provided by tshark, the sharkPy project devs will start the process of segmenting the code base as described above.

HOW-TO

VM INSTALL

Should install/run on most linux distros as long as Wireshark version 2.0.1 or newer is installed and the following steps (or equivalent) are successful.

## ubuntu-16.04-desktop-amd64 -- clean install
sudo apt-get git
git clone https://github.com/NationalSecurityAgency/sharkPy
sudo apt-get install libpcap-dev
sudo apt-get install libglib2.0-dev
sudo apt-get install libpython-dev
sudo apt-get install wireshark-dev #if you didn't build/install wireshark (be sure wireshark libs are in LD_LIBRARY_PATH)
sudo apt-get install wireshark #if you didn't build/install wireshark (be sure wireshark libs are in LD_LIBRARY_PATH)
cd sharkPy
sudo ./setup install

DOCKER

Set up
First, make sharkPy directory and place Dockerfile into it. cd into this new directory.<br/>

Build sharkPy Docker image
docker build -t "ubuntu16_04:sharkPy" .

Notes:
  • build will take a while and should be completely automated.
  • sharkPy dist code will be in /sharkPy
  • build creates Ubuntu 16.04 image and installs sharkPy as a Python module

Run interactively as Docker container.
Should give you command prompt
docker run -it ubuntu16_04:sharkPy /bin/bash

Command prompt and access to host NICs (to allow for network capture)
docker run -it --net=host ubuntu16_04:sharkPy /bin/bash


sharkPy API

Dissecting packets from file

dissect_file(file_path, options=[], timeout=10): collect packets from packet capture file delivering packet dissections when requested using get_next_from_file function.
  • name of packet capture file.
  • collection and dissection options. Options are disopt.DECODE_AS and disopt.NAME_RESOLUTION.
  • timeout: amount of time (in seconds) to wait before file open fails.
  • RETURNS tuple (p, exit_event, shared_pipe):
    • p: dissection process handle.
    • exit_event: event handler used to signal that collection should stop.
    • shared_pipe: shared pipe that dissector returns dissection trees into.
    • NOTE: users should not directly interact with these return objects. Instead returned tuple is passed into get_next_from_file and close_file functions as input param.
get_next_from_file(dissect_process,timeout=None): get next available packet dissection.
  • dissect_process: tuple returned from the dissect_file function.
  • timeout: amount to time to wait (in seconds) before operation timesout.
  • RETURNS root node of packet dissection tree.
close_file(dissect_process): stop and clean up.
  • dissect_process: tuple returned from the dissect_file function.
  • RETURNS None.
  • NOTE: close_file MUST be called on each session.

Dissecting packets from wire

dissect_wire(interface, options=[], timeout=None): collect packets from interface delivering packet dissections when requested using get_next function.
  • name of interface to capture from.
  • collection and dissection options. Options are disopt.DECODE_AS, disopt.NAME_RESOLUTION, and disopt.NOT_PROMISCUOUS.
  • timeout: amount of time (in seconds) to wait before start capture fails.
  • RETURNS tuple (p, exit_event, shared_queue).
    • p: dissection process handle.
    • exit_event: event handler used to signal that collection should stop.
    • shared_queue: shared queue that dissector returns dissection trees into.
    • NOTE: users should not directly interact with these return objects. Instead returned tuple is passed into get_next_from_wire and close_wire functions as input param.
get_next_from_wire(dissect_process,timeout=None): get next available packet dissection from live capture.
  • dissect_process: tuple returned from the dissect_wire function.
  • timeout: amount to time to wait (in seconds) before operation timesout.
  • RETURNS root node of packet dissection tree.
close_wire(dissect_process): stop and clean up from live capture.
  • dissect_process: tuple returned from the dissect_wire function.
  • RETURNS None.
  • NOTE: close_wire MUST be called on each capture session.

Writing data/packets on wire or to file

wire_writer(write_interface_list): wire_writer constructor. Used to write arbitrary data to interfaces.
  • write_interface_list: list of interface names to write to.
  • RETURNS: wire_writer object.
    • wire_writer.cmd: pass a command to writer.
      • wr.cmd(command=wr.WRITE_BYTES, command_data=data_to_write, command_timeout=2)
      • wr.cmd(command=wr.SHUT_DOWN_ALL, command_data=None, command_data=2)
      • wr.cmd(command=wr.SHUT_DOWN_NAMED, command_data=interface_name, command_data=2)
    • wire_writer.get_rst(timeout=1): RETURNS tuple (success/failure, number_of_bytes_written)
file_writer(): Creates a new file_writer object to write packets to an output pcap file.
  • make_pcap_error_buffer(): Creates a correctly sized and initialized error buffer.
    • Returns error buffer.
  • pcap_write_file(output_file_path, error_buffer): create and open new pcap output file.
    • output_file_path: path for newly created file.
    • err_buffer: error buffer object returned by make_pcap_error_buffer(). Any errors messages will be written to this buffer.
    • RETURNS: ctypes.c_void_p, which is a context object required for other write related functions.
  • pcap_write_packet(context, upper_time_val, lower_time_val, num_bytes_to_write, data_to_write, error_buffer): writes packets to opened pcap output file.
    • context: object returned by pcap_write_file().
    • upper_time_val: packet epoch time in seconds. Can be first value in tuple returned from utility function get_pkt_times().
    • lower_time_val: packet epoch time nano seconds remainder. Can be second value in tuple returned from utility function get_pkt_times().
    • num_bytes_to_write: number of bytes to write to file, size of data buffer.
    • data_to_write: buffer of data to write.
    • err_buffer: error buffer object returned by make_pcap_error_buffer(). Any errors messages will be written to this buffer.
    • RETURNS 0 on success, -1 on failure. Error message will be available in err_buffer.
  • pcap_close(context): MUST be called to flush write buffer, close write file, and free allocated resources.
    • context: object returned by pcap_write_file().
    • RETURNS: None.

Utility functions

do_funct_walk(root_node, funct, aux=None): recursively pass each node in dissection tree (and aux) to function. Depth first walk.
  • root_node: node in dissection tree that will be the first to be passed to function.
  • funct: function to call.
  • aux: optional auxilliary variable that will be passed in as parameter as part of each function call.
  • RETURNS None.
get_node_by_name(root_node, name): finds and returns a list of dissection nodes in dissection tree with a given name (i.e. 'abbrev').
  • root_node: root of dissection tree being passed into function.
  • name: Name of node used as match key. Matches again 'abbrev' attribute.
  • RETURNS: a list of nodes in dissection tree with 'abbrev' attribute that matches name.
  • NOTE: 'abbrev' attribute is not necessarily unique in a given dissection tree. This is the reason that this function returns a LIST of matching nodes.
get_node_data_details(node): Returns a tuple of values that describe the data in a given dissection node.
  • node: node that will have its details provided.
  • RETURNS: tuple (data_len,first_byte_index, last_byte_index, data, binary_data).
    • data_len: number of bytes in node's data.
    • first_byte_index: byte offset from start of packet where this node's data starts.
    • last_byte_index: byte offset from start of packet where this node's data ends.
    • data: string representation of node data.
    • binary_data: binary representation of node data.
get_pkt_times(pkt=input_packet): Returns tuple containing packet timestamp information.
  • pkt: packet dissection tree returned from one of sharkPy's dissection routines.
  • RETURNS: The tuple (epoch_time_seconds, epoch_time_nanosecond_remainder). These two values are required for file_writer instances.
find_replace_data(pkt, field_name, test_val, replace_with=None, condition_funct=condition_data_equals, enforce_bounds=True, quiet=True): A general search, match, and replace data in packets.
  • pkt: packet dissection tree returned from one of sharkPy's dissection routines.
  • field_name: the 'abbrev' field name that will have its data modified/replaced.
  • test_val: data_val/buffer that will be used for comparison in matching function.
  • replace_with: data that will replace the data in matching dissection fields.
  • condition_funct: A function that returns True or False and has the prototype condition_funct(node_val, test_val, pkt_dissection_tree). Default is the condition_data_equals() function that returns True if node_val == test_val. This is a literal byte for byte matching.
  • enforce_bounds: If set to True, enforces condition that len(replace_with) == len(node_data_to_be_replaced). Good idea to keep this set to its default, which is True.
  • quiet: If set to False, will print error message to stdout if the target field 'abbrev' name cannot be found in packet dissection tree.
  • RETURNS: new packet data represented as a hex string or None if target field is not in packet.
condition_data_equals(node_val, test_val, pkt_dissection_tree=None): A matching function that can be passed to find_replace_data().
  • node_val: value from the dissected packet that is being checked
  • test_val: value that node_val will be compared to.
  • pkt_dissection_tree: entire packet dissection tree. Not used in this comparison.
  • RETURNS True if a byte for byte comparison reveals that node_val == test_val. Otherwise, returns False.
condition_always_true(node_val=None, test_val=None, pkt_dissection_tree=None): A matching function that can be passed to find_replace_data().
  • node_val: Not used in this comparison
  • test_val: Not used in this comparison
  • pkt_dissection_tree: entire packet dissection tree. Not used in this comparison.
  • RETURNS True ALWAYS. Useful of the only matching criteria is that the target field exists in packet dissection.

Protocol Blender

ipv4_find_replace(pkt_dissection, src_match_value=None, dst_match_value=None, new_srcaddr=None, new_dstaddr=None, update_checksum=True, condition_funct=sharkPy.condition_data_equals): Modifies select ipv4 fields.
  • pkt_dissection: packet dissection tree.
  • src_match_value: current source ip address to look for (in hex). This value will be replaced.
  • dst_match_value: current destination ip address to look for (in hex). This value will be replaced.
  • new_srcaddr: replace current source ip address with this ip address (in hex).
  • new_dstaddr: replace current destination ip address with this ip address (in hex).
  • update_checksum: fixup ipv4 checksum if True (default).
  • condition_funct: matching function used to find correct packets to modify.
tcp_find_replace(pkt_dissection, src_match_value=None, dst_match_value=None, new_srcport=None, new_dstport=None, update_checksum=True, condition_funct=sharkPy.condition_data_equals): Modifies select fields for tcp over ipv4.
  • pkt_dissection: packet dissection tree.
  • src_match_value: current source tcp port to look for (in hex). This value will be replaced.
  • dst_match_value: current destination tcp port to look for (in hex). This value will be replaced.
  • new_srcaddr: replace current source tcp port with this tcp port (in hex).
  • new_dstaddr: replace current destination tcp port with this tcp port (in hex).
  • update_checksum: fixup tcp checksum if True (default).
  • condition_funct: matching function used to find correct packets to modify.

Dissect packets in a capture file
>>> import sharkPy

Supported options so far are DECODE_AS and NAME_RESOLUTION (use option to disable)
>>> in_options=[(sharkPy.disopt.DECODE_AS, r'tcp.port==8888-8890,http'), (sharkPy.disopt.DECODE_AS, r'tcp.port==9999:3,http')]

Start file read and dissection.
>>> dissection = sharkPy.dissect_file(r'/home/me/capfile.pcap', options=in_options)

Use sharkPy.get_next_from_file to get packet dissections of read packets.
>>> rtn_pkt_dissections_list = []
>>> for cnt in xrange(13):
... pkt = sharkPy.get_next_from_file(dissection)
... rtn_pkt_dissections_list.append(pkt)

Node Attributes:
abbrev: frame.
name: Frame.
blurb: None.
fvalue: None.
level: 0.
offset: 0.
ftype: 1.
ftype_desc: FT_PROTOCOL.
repr: Frame 253: 54 bytes on wire (432 bits), 54 bytes captured (432 bits) on interface 0.
data: 005056edfe68000c29....<rest edited out>

Number of child nodes: 17
frame.interface_id
frame.encap_type
frame.time
frame.offset_shift
frame.time_epoch
frame.time_delta
frame.time_delta_displayed
frame.time_relative
frame.number
frame.len
frame.cap_len
frame.marked
frame.ignored
frame.protocols
eth
ip
tcp

Node Attributes:
abbrev: frame.interface_id.
name: Interface id.
blurb: None.
fvalue: 0.
level: 1.
offset: 0.
ftype: 6.
ftype_desc: FT_UINT32.
repr: Interface id: 0 (eno16777736).
data: None.

Number of child nodes: 0

...<remaining edited out>

Must always close sessions
>>> sharkPy.close_file(dissection)

Take a packet dissection tree and index all nodes by their names (abbrev field)
>>> pkt_dict = {}
>>> sharkPy.collect_proto_ids(rtn_pkt_dissections_list[0], pkt_dict)

Here are all the keys used to index this packet dissection
>>> print pkt_dict.keys()
['tcp.checksum_bad', 'eth.src_resolved', 'tcp.flags.ns', 'ip', 'frame', 'tcp.ack', 'tcp', 'frame.encap_type', 'eth.ig', 'frame.time_relative', 'ip.ttl', 'tcp.checksum_good', 'tcp.stream', 'ip.version', 'tcp.seq', 'ip.dst_host', 'ip.flags.df', 'ip.flags', 'ip.dsfield', 'ip.src_host', 'tcp.len', 'ip.checksum_good', 'tcp.flags.res', 'ip.id', 'ip.flags.mf', 'ip.src', 'ip.checksum', 'eth.src', 'text', 'frame.cap_len', 'ip.hdr_len', 'tcp.flags.cwr', 'tcp.flags', 'tcp.dstport', 'ip.host', 'frame.ignored', 'tcp.window_size', 'eth.dst_resolved', 'tcp.flags.ack', 'frame.time_delta', 'tcp.flags.urg', 'ip.dsfield.ecn', 'eth.addr_resolved', 'eth.lg', 'frame.time_delta_displayed', 'frame.time', 'tcp.flags.str', 'ip.flags.rb', 'tcp.flags.fin', 'ip.dst', 'tcp.flags.reset', 'tcp.flags.ecn', 'tcp.port', 'eth.type', 'ip.checksum_bad', 'tcp.window_size_value', 'ip.addr', 'ip.len', 'frame.time_epoch', 'tcp.hdr_len', 'frame.number', 'ip.dsfield.dscp', 'frame.marked', 'eth.dst', 'tcp.flags.push', 'tcp.srcport', 'tcp.checksum', 'tcp.urgent_pointer', 'eth.addr', 'frame.offset_shift', 'tcp.window_size_scalefactor', 'ip.frag_offset', 'tcp.flags.syn', 'frame.len', 'eth', 'ip.proto', 'frame.protocols', 'frame.interface_id']

Note that pkt_dict entries are lists given that 'abbrevs' are not always unique within a packet.
>>> val_list = pkt_dict['tcp']

Turns out that 'tcp' list has only one element as shown below.
>>> for each in val_list:
... print each
...
Node Attributes:
abbrev: tcp.
name: Transmission Control Protocol.
blurb: None.
fvalue: None.
level: 0.
offset: 34.
ftype: 1.
ftype_desc: FT_PROTOCOL.
repr: Transmission Control Protocol, Src Port: 52630 (52630), Dst Port: 80 (80), Seq: 1, Ack: 1, Len: 0.
data: cd960050df6129ca0d993e7750107d789f870000.

Number of child nodes: 15
tcp.srcport
tcp.dstport
tcp.port
tcp.port
tcp.stream
tcp.len
tcp.seq
tcp.ack
tcp.hdr_len
tcp.flags
tcp.window_size_value
tcp.window_size
tcp.window_size_scalefactor
tcp.checksum
tcp.urgent_pointer

Shortcut for finding a node by name:
>>> val_list = sharkPy.get_node_by_name(rtn_pkt_dissections_list[0], 'ip')

Each node in a packet dissection tree has attributes and a child node list.
>>> pkt = val_list[0]

This is how one accesses attributes
>>> print pkt.attributes.abbrev
tcp
>>> print pkt.attributes.name
Transmission Control Protocol

Here's the pkt's child list
>>> print pkt.children
[<sharkPy.dissect.file_dissector.node object at 0x10fda90>, <sharkPy.dissect.file_dissector.node object at 0x10fdb10>, <sharkPy.dissect.file_dissector.node object at 0x10fdbd0>, <sharkPy.dissect.file_dissector.node object at 0x10fdc90>, <sharkPy.dissect.file_dissector.node object at 0x10fdd50>, <sharkPy.dissect.file_dissector.node object at 0x10fddd0>, <sharkPy.dissect.file_dissector.node object at 0x10fde50>, <sharkPy.dissect.file_dissector.node object at 0x10fded0>, <sharkPy.dissect.file_dissector.node object at 0x10fdf90>, <sharkPy.dissect.file_dissector.node object at 0x1101090>, <sharkPy.dissect.file_dissector.node object at 0x11016d0>, <sharkPy.dissect.file_dissector.node object at 0x11017d0>, <sharkPy.dissect.file_dissector.node object at 0x1101890>, <sharkPy.dissect.file_dissector.node object at 0x1101990>, <sharkPy.dissect.file_dissector.node object at 0x1101b50>]

Get useful information about a dissection node's data
>>> data_len, first_byte_offset, last_byte_offset, data_string_rep, data_binary_rep=sharkPy.get_node_data_details(pkt)
>>> print data_len
54
>>> print first_byte_offset
0
>>> print last_byte_offset
53
>>> print data_string_rep
005056edfe68000c29....<rest edited out>
>>> print binary_string_rep
<prints binary spleg, edited out>

CAPTURE PACKETS FROM NETWORK AND DISSECT THEM

SharkPy wire_dissector provides additional NOT_PROMISCUOUS option
>>> in_options=[(sharkPy.disopt.DECODE_AS, r'tcp.port==8888-8890,http'), (sharkPy.disopt.DECODE_AS, r'tcp.port==9999:3,http'), (sharkPy.disopt.NOT_PROMISCUOUS, None)]

Start capture and dissection. Note that caller must have appropriate permissions. Running as root could be dangerous!
>>> dissection = sharkPy.dissect_wire(r'eno16777736', options=in_options)
>>> Running as user "root" and group "root". This could be dangerous.

Use sharkPy.get_next_from_wire to get packet dissections of captured packets.
>>> for cnt in xrange(13):
... pkt=sharkPy.get_next_from_wire(dissection)
... sharkPy.walk_print(pkt) ## much better idea to save pkts in a list

Must always close capture sessions
>>> sharkPy.close_wire(dissection)

WRITE DATA (packets) TO NETWORK

Create writer object using interface name
>>> wr = sharkPy.wire_writer(['eno16777736'])

Send command to write data to network with timeout of 2 seconds
>>> wr.cmd(wr.WRITE_BYTES,'  djwejkweuraiuhqwerqiorh', 2)

Check for failure. If successful, get return values.
>>> if(not wr.command_failure.is_set()):
... print wr.get_rst(1)
...
(0, 26) ### returned success and wrote 26 bytes. ###

WRITE PACKETS TO OUTPUT PCAP FILE

Create file writer object
>>> fw = file_writer()

Create error buffer
>>> errbuf = fw.make_pcap_error_buffer()

Open/create new output pcap file into which packets will be written
>>> outfile = fw.pcap_write_file(r'/home/me/test_output_file.pcap', errbuf)

Dissect packets in an existing packet capture file.
>>> sorted_rtn_list = sharkPy.dissect_file(r'/home/me/tst.pcap', timeout=20)

Write first packet into output pcap file.

Get first packet dissection
>>> pkt_dissection=sorted_rtn_list[0]

Acquire packet information required for write operation
>>> pkt_frame = sharkPy.get_node_by_name(pkt_dissection, 'frame')
>>> frame_data_length, first_frame_byte_index, last_frame_byte_index, frame_data_as_string, frame_data_as_binary = sharkPy.get_node_data_details(pkt_frame[0])
>>> utime, ltime = sharkPy.get_pkt_times(pkt_dissection)

Write packet into output file
>>> fw.pcap_write_packet(outfile, utime, ltime, frame_data_length, frame_data_as_binary, errbuf)

Close output file and clean-up
>>> fw.pcap_close(outfile)

Match and replace before writing new packets to output pcap file
import sharkPy, binascii

test_value1 = r'0xc0a84f01'
test_value2 = r'c0a84fff'
test_value3 = r'005056c00008'

fw = sharkPy.file_writer()
errbuf = fw.make_pcap_error_buffer()
outfile = fw.pcap_write_file(r'/home/me/test_output_file.pcap', errbuf)
sorted_rtn_list = sharkPy.dissect_file(r'/home/me/tst.pcap', timeout=20)

for pkt in sorted_rtn_list:

# do replacement
new_str_data = sharkPy.find_replace_data(pkt, r'ip.src', test_value1, r'01010101')
new_str_data = sharkPy.find_replace_data(pkt, r'ip.dst', test_value2, r'02020202')
new_str_data = sharkPy.find_replace_data(pkt, r'eth.src', test_value3, r'005050505050')

# get detains required to write to output pcap file
pkt_frame = sharkPy.get_node_by_name(pkt, 'frame')
fdl, ffb, flb, fd, fbd = sharkPy.get_node_data_details(pkt_frame[0])
utime, ltime = sharkPy.get_pkt_times(pkt)

if(new_str_data is None):
new_str_data = fd

newbd = binascii.a2b_hex(new_str_data)
fw.pcap_write_packet(outfile, utime, ltime, fdl, newbd, errbuf)

fw.pcap_close(outfile)


BruteSploit - Collection Of Method For Automated Generate, Bruteforce And Manipulation Wordlist


BruteSploit is a collection of method for automated Generate, Bruteforce and Manipulation wordlist with interactive shell. That can be used during a penetration test to enumerate and can be used in CTF for manipulation,combine,transform and permutation some words or file text.

Tutorial 
Check in this video :

Changelog
  • v.1.1.1 Added Brute Instagram
  • v.1.1.0 Fixed Bugs
  • v.1.0.0 Release Brutsploit

Getting Started
  1. git clone https://github.com/Screetsec/Brutesploit.git
  2. cd Brutesploit
  3. chmod +x Brutesploit
  4. sudo ./Brutesploit or sudo su ./Brutesploit

A linux operating system. We recommend :
  • Kali Linux 2 or Kali 2016.1 rolling
  • Cyborg
  • Parrot
  • BackTrack
  • Backbox

Credits

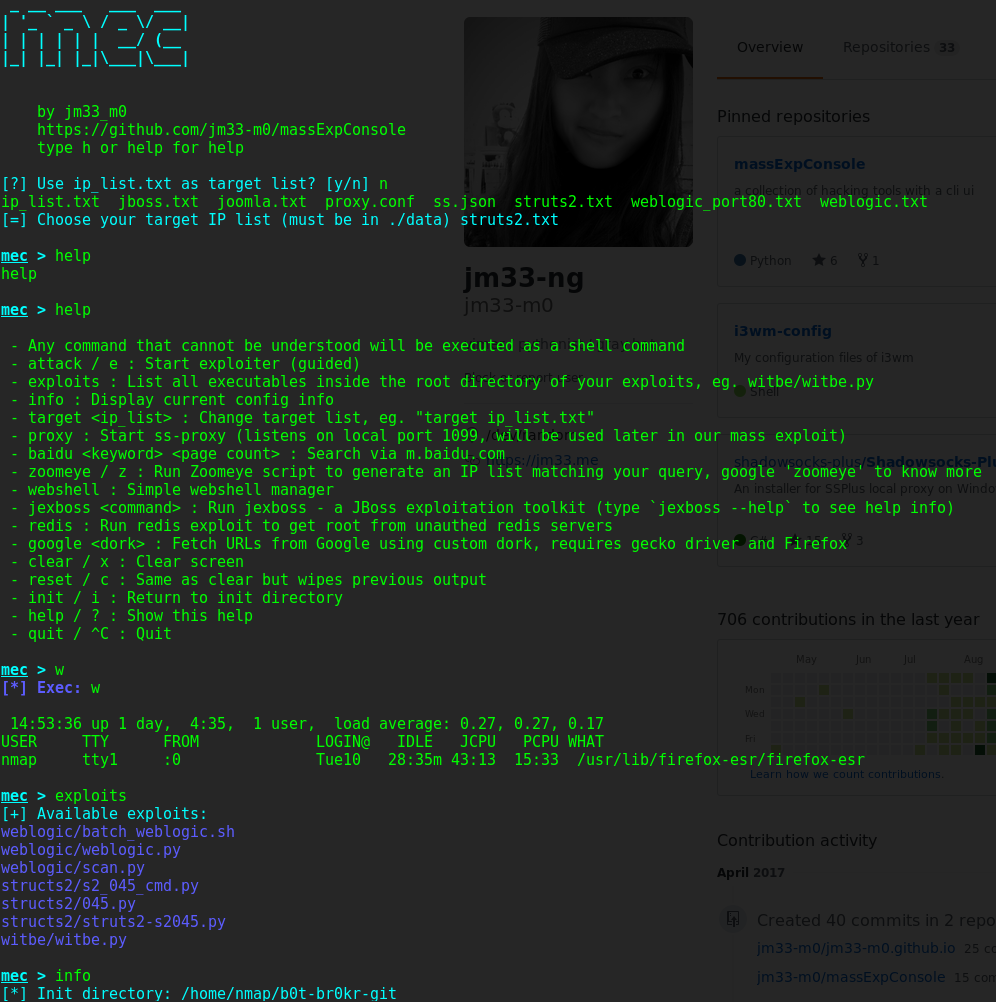
massExpConsole - Collection of Tools and Exploits with a CLI UI


Collection of Tools and Exploits with a CLI UI

What does it do?
  • an easy-to-use user interface (cli)
  • execute any adapted exploit with process-level concurrency
  • crawler for baidu and zoomeye
  • a simple webshell manager
  • some built-in exploits (automated)
  • more to come...

Requirements
  • GNU/Linux or MacOS, WSL (Windows Subsystem Linux), fully tested under Kali Linux (Rolling, 2017), Ubuntu Linux (16.04 LTS) and Fedora 25 (it will work on other distros too as long as you have dealt with all deps)
  • proxychains4 (in $PATH), used by exploiter, requires a working socks5 proxy (you can modify its config in mec.py)
  • Java is required when using Java deserialization exploits, you might want to install openjdk-8-jre if you haven't installed it yet
  • python packages (not complete, as some third-party scripts might need other deps as well):
    • requests
    • bs4
    • beautifulsoup4
    • html5lib
    • docopt
    • pip3 install on the go
  • note that you have to install all the deps of your exploits or tools as well

Usage
  • just run mec.py, if it complains about missing modules, install them
  • if you want to add your own exploit script (or binary file, whatever):
    • cd exploits, mkdir <yourExploitDir>
    • your exploit should take the last argument passed to it as its target, dig into mec.py to know more
    • chmod 755 <exploitBin> to make sure it can be executed by current user
    • use attack command then m to select your custom exploit
  • type help in the console to see all available features

Freedom Fighting - A collection of scripts which may come in handy during your freedom fighting activities


Freedom Fighting scripts
This repository contains scripts which may come in handy during your freedom fighting activities. It will be updated occasionally, when I find myself in need of something I can't find online. Everything here is distributed under the terms of the GPL v3 License.

nojail.py
A log cleaner which removes incriminating entries in:
  • /var/run/utmp, /var/log/wtmp, /var/log/btmp (controls the output of the who, w and last commands)
  • /var/log/lastlog (controls the output of the lastlog command)
  • /var/**/*.log (.log.1, .log.2.gz, etc. included)
  • Any additional file or folder designated by the user
Entries are deleted based on an IP address and/or associated hostname.
Special care is taken to avoid breaking file descriptors while tampering with logs. This means logs continue to be written to after they've been tampered with, making the cleanup a lot less conspicuous. All the work takes place in a tmpfs drive and any files created are wiped securely.
Warning: The script has only been tested on Linux and will not be able to clean UTMP entries on other Unix flavors.

Usage:
usage: nojail.py [-h] [--user USER] [--ip IP] [--hostname HOSTNAME]
[--verbose] [--check]
[log_files [log_files ...]]

Stealthy log file cleaner.

positional arguments:
log_files Specify any log files to clean in addition to
/var/**/*.log.

optional arguments:
-h, --help show this help message and exit
--user USER, -u USER The username to remove from the connexion logs.
--ip IP, -i IP The IP address to remove from the logs.
--hostname HOSTNAME The hostname of the user to wipe. Defaults to the rDNS
of the IP.
--verbose, -v Print debug messages.
--check, -c If present, the user will be asked to confirm each
deletion from the logs.
--daemonize, -d Start in the background and delete logs when the
current session terminates. Implies --self-delete.
--self-delete, -s Automatically delete the script after its execution.
By default, if no arguments are given, the script will try to determine the IP address to scrub based on the SSH_CONNECTION environment variable. Any entry matching the reverse DNS of that IP will be removed as well.

Basic example:
./nojail.py --user root --ip 151.80.119.32 /etc/app/logs/access.log --check
...will remove all entries for the user root where the IP address is 151.80.119.32 or the hostame is manalyzer.org. The user will also be prompted before deleting each record because of the --check option. Finally, the file /etc/app/logs/access.log will be processed in addition to all the default ones.
If folders are given as positional arguments (/etc/app/logs/ for instance), the script will recursively crawl them and clean any file with the .log extension (*.log.1, *.log.2.gz, etc. included).

Daemonizing the script
./nojail.py --daemonize
Assuming this is run from an SSH connexion, this command will delete all logs pertaining to the current user's activity with the detected IP address and hostname right after the connexion is closed. This script will subsequently automatically delete itself. Please bear in mind that you won't have any opportunity to receive error messages from the application. You are encouraged to try deleting the logs once before spawning the demon to make sure that the arguments you specified are correct.

Sample output:
root@proxy:~# ./nojail.py
[ ] Cleaning logs for root (XXX.XXX.XXX.XXX - domain.com).
[*] 2 entries removed from /var/run/utmp!
[*] 4 entries removed from /var/log/wtmp!
[ ] No entries to remove from /var/log/btmp.
[*] Lastlog set to 2017-01-09 17:12:49 from pts/0 at lns-bzn-37-79-250-104-19.adsl.proxad.net
[*] 4 lines removed from /var/log/nginx/error.log!
[*] 11 lines removed from /var/log/nginx/access.log!
[*] 4 lines removed from /var/log/auth.log!

Disclaimer
This script is provided without any guarantees. Don't blame me it doesn't wipe all traces of something you shouldn't have done in the first place.

share.sh
A portable and secure file sharing script. While freedom fighting, it is generally not possible to scp files into compromised machines. Alternate ways to upload files are needed, but most sharing services are either too restrictive or do not provide a way to retrieve files easily from the command line. Security considerations may also prevent people from uploading sensitive files to cloud providers for fear that they will keep a copy of it forever.
This small and portable bash script relies on transfer.sh to solve that problem. It...
  • Encrypts files before uploading them (symmetric AES-256-CBC).
  • Automatically uses torify if it is present on the system for increased anonimity.
The only dependencies needed are openssl and either curl or wget.

Usage
root@proxy:~# ./share.sh ~/file_to_share "My_Secure_Encryption_Key!"
Success! Retrieval command: ./share.sh -r file_to_share "My_Secure_Encryption_Key!" https://transfer.sh/BQPFz/28239
root@proxy:~# ./share.sh -r file_to_share "My_Secure_Encryption_Key!" https://transfer.sh/BQPFz/28239
File retrieved successfully!
Additional arguments during the upload allow you to control the maximum number of downloads allowed for the file (-m) and how many days transfer.sh will keep it (-d). The default value for both these options is 1.
Warning: Do not use spaces in the encryption key, or only the first word of your passphrase will be taken into account. This is due to the way getopts handles arguments (I think). Pull requests are welcome if anyone is interested in fixing this.

autojack.py
AutoJack is a short script leveraging EmptyMonkey's shelljack to log the terminal of any user connecting through SSH. It watches auth.log for successful connections, figures out the PID of the user's bash process,and leaves the rest to shelljack.
Launch it in a screen, and wait until other users log-in. Their session will be logged to /root/.local/sj.log.[user].[timestamp].
The script is not particularly stealthy (no attempt is made to hide the shelljack process) but it will get the job done. Note that to avoid self-incrimination, the root user is not targeted (this can be trivially commented out in the code).


Web Exploit Detector - Tool To Detect Possible Infections, Malicious Code And Suspicious Files In Web Hosting Environments


The Web Exploit Detector is a Node.js application (and NPM module) used to detect possible infections, malicious code and suspicious files in web hosting environments. This application is intended to be run on web servers hosting one or more websites. Running the application will generate a list of files that are potentially infected together with a description of the infection and references to online resources relating to it.

As of version 1.1.0 the application also includes utilities to generate and compare snapshots of a directory structure, allowing users to see if any files have been modified, added or removed.
The application is hosted here on GitHub so that others can benefit from it, as well as allowing others to contribute their own detection rules.

Installation

Regular users
The simplest way to install Web Exploit Detector is as a global NPM module: -
npm install -g web_exploit_detector
If you are running Linux or another Unix-based OS you might need to run this command as root (e.g. sudo npm install -g web_exploit_detector).

Updating
The module should be updated regularly to make sure that all of the latest detection rules are present. Running the above command will always download the latest stable (tested) version. To update a version that has already been installed, simply run the following: -
npm update -g web_exploit_detector
Again, you may have to use the sudo command as above.

Technical users
You can also clone the Git repository and run the script directly like so: -
  1. git clone https://github.com/polaris64/web_exploit_detector
  2. cd web_exploit_detector
  3. npm install

Running

From NPM module
If you have installed Web Exploit Detector as an NPM module (see above) then running the scanner is as simple as running the following command, passing in the path to your webroot (location of your website files): -
wed-scanner --webroot=/var/www/html
Other command-line options are available, simply run wed-scanner --help to see a help message describing them.
Running the script in this way will produce human-readable output to the console. This is very useful when running the script with cron for example as the output can be sent as an e-mail whenever the script runs.
The script also supports the writing of results to a more computer-friendly JSON format for later processing. To enable this output, see the --output command line argument.

From cloned Git repository
Simply call the script via node and pass the path to your webroot as follows: -
node index.js --webroot=/var/www/html

Recursive directory snapshots
The Web Exploit Detector also comes with two utilities to help to identify files that might have changed unexpectedly. A successful attack on a site usually involves deleting files, adding new files or changing existing files in some way.

Snapshots
A snapshot (as used by these utilities) is a JSON file which lists all files as well as a description of their contents at the point in which the snapshot was created. If a snapshot was generated on Monday, for example, and then the site was attacked on Tuesday, then running a comparison between this snapshot and the current site files afterwards will show that one or more files were added, deleted or changed. The goal of these utilities therefore is to allow these snapshots to be created and for the comparisons to be performed when required.
The snapshot stores each file path together with a SHA-256 hash of the file contents. A hash, or digest, is a small summary of a message, which in this case is the file's contents. If the file contents change, even in a very small way, the hash will become completely different. This provides a good way of detecting any changes to file contents.

Usage
The following two utilities are also installed as part of Web Exploit Detector: -
  • wed-generate-snapshot: this utility allows a snapshot to be generated for all files (recursively) in a directory specified by "--webroot". The snapshot will be saved to a file specified in the "--output" option.
  • wed-compare-snapshot: once a snapshot has been generated it can be compared against the current contents of the same directory. The snapshot to check is specified using the "--snapshot" option. The base directory to check against is stored within the snapshot, but if the base directory has changed since the snapshot was generated then the --webroot option can be used.

Workflow
Snapshots can be generated as frequently as required, but as a general rule of thumb they should be generated whenever a site is in a clean (non-infected) state and whenever a legitimate change has been made. For CMS-based sites like WordPress, snapshots should be created regularly as new uploads will cause the new state to change from the stored snapshot. For sites whose files should never change, a single snapshot can be generated and then used indefinitely ensure nothing actually does change.

Usage as a module
The src/web-exploit-detector.js script is an ES6 module that exports the set of rules as rules as well as a number of functions: -
  • executeTests(settings): runs the exploit checker based on the passed settings object. For usage, please consult the index.js script.
  • formatResult(result): takes a single test result from the array returned from executeTests() and generates a string of results ready for output for that test.
  • getFileList(path): returns an array of files from the base path using readDirRecursive().
  • processRulesOnFile(file, rules): processes all rules from the array rules on a single file (string path).
  • readDirRecursive(path): recursive function which returns a Promise which will be resolved with an array of all files in path and sub-directories.
The src/cli.js script is a simple command-line interface (CLI) to this module as used by the wed-scanner script, so reading this script shows one way in which this module can be used.
The project uses Babel to compile the ES6 modules in "src" to plain JavaScript modules in "lib". If you are running an older version of Node.js then modules can be require()'d from the "lib" directory instead.

Building
The package contains Babel as a dev-dependency and the "build" and "watch:build" scripts. When running the "build" script (npm run build), the ES6 modules in "./src" will be compiled and saved to "./lib", where they are included by the CLI scripts.
The "./lib" directory is included in the repository so that any user can clone the repository and run the application directly without having to install dev-dependencies and build the application.

Excluding results per rule
Sometimes rules, especially those tagged with suspicion, will identify a clean file as a potential exploit. Because of this, a system to allow files to be excluded from being checked for a rule is also included.
The wed-results-to-exceptions script takes an output file from the main detector script (see the --output option) and gives you the choice to exclude each file in turn for each specific rule. All excluded files are stored in a file called wed-exceptions.json (in the user's home directory) which is read by the main script before running the scan. If a file is listed in this file then all attached rules (by ID) will be skipped when checking this file.
For usage instructions, simply run wed-results-to-exceptions. You will need to have a valid output JSON from a previous run of the main detector first using the --output option.
For users working directly with the Git repository, run node results_to_exceptions.js in the project root directory.

Rule engine
The application operates using a collection of "rules" which are loaded when the application is run. Each rule consists of an ID, name, description, list of URLs, tags, deprecation flag and most importantly a set of tests.
Each individual test must be one of the following: -
  • A regular expression: the simplest type of test, any value matching the regex will pass the test.
  • A Boolean callback: the callback function must return a Boolean value indicating if the value passes the test. The callback is free to perform any synchronous operations.
  • A Promise callback: the callback function must return a Promise which is resolved with a Boolean value indicating if the value passes the test. This type of callback is free to perform any asynchronous operations.
The following test types are supported: -
  • "path": used to check the file path. This test must exist and should evaluate to true if the file path is considered to match the rule.
  • "content": used to check the contents of a file. This test is optional and file contents will only be read and sent to rules that implement this test type. When this test is a function, the content (string) will be passed as the first argument and the file path will be passed as the second argument, allowing the test to perform additional file operations.

Expanding on the rules
As web-based exploits are constantly evolving and new exploits are being created, the set of rules need to be updated too. As I host a number of websites I am constantly observing new kinds of exploits, so I will be adding to the set of rules whenever I can. I run this tool on my own servers, so of course I want it to be as functional as possible!
This brings me onto the reasons why I have made this application available as an open-source project: firstly so that you and others can benefit from it and secondly so that we can all collaborate to contribute detection rules so that the application is always up to date.

Contributing rules
If you have discovered an exploit that is not detected by this tool then please either contact me to let me know or even better, write your own rule and add it to the third-party rule-set (rules/third-party/index.js), then send me a pull request.
Don't worry if you don't know how to write your own rules; the most important thing is that the rule gets added, so feel free to send me as much information as you can about the exploit and I will try to create my own rule for it.
Rules are categorised, but the simplest way to add your own rule is to add it to the third-party rule-set mentioned above. Rule IDs are written in the following format: "author:type:sub-type(s):rule-id". For example, one of my own rules is "P64:php:cms:wordpress:wso_webshell". "P64" is me (the author), "php:cms:wordpress" is the grouping (a PHP-specific rule, for the Content Management System (CMS) called WordPress) and "wso_webshell" is the specific rule ID. When writing your own rules, try to follow this format, and replace "P64" with your own GitHub username or other unique ID.

Unit tests and linting
The project contains a set of Jasmine tests which can be run using npm test. It also contains an ESLint configuration, and ESLint can be run using npm run lint.
When developing, tests can also be run whenever a source file changes by running npm run watch:test. To run tests and ESLint, the npm run watch:all script can be used.
Please note that unless you already have Jasmine and/or nodemon installed, you should run npm install in non-production mode to ensure that the dev-dependencies are installed.


Exploit Database - The official Exploit Database Repository


The Exploit Database is an archive of public exploits and corresponding vulnerable software, developed for use by penetration testers and vulnerability researchers. Its aim is to serve as the most comprehensive collection of exploits gathered through direct submissions, mailing lists, and other public sources, and present them in a freely-available and easy-to-navigate database. The Exploit Database is a repository for exploits and proof-of-concepts rather than advisories, making it a valuable resource for those who need actionable data right away.

This repository is updated daily with the most recently added submissions. Any additional resources can be found in our binary sploits repository.

Included with this repository is the searchsploit utility, which will allow you to search through the exploits using one or more terms. For more information, please see the SearchSploit manual.

root@kali:~# searchsploit -h
Usage: searchsploit [options] term1 [term2] ... [termN]

==========
Examples
==========
searchsploit afd windows local
searchsploit -t oracle windows
searchsploit -p 39446

=========
Options
=========
-c, --case [Term] Perform a case-sensitive search (Default is inSEnsITiVe).
-e, --exact [Term] Perform an EXACT match on exploit title (Default is AND) [Implies "-t"].
-h, --help Show this help screen.
-j, --json [Term] Show result in JSON format.
-m, --mirror [EDB-ID] Mirror (aka copies) an exploit to the current working directory.
-o, --overflow [Term] Exploit titles are allowed to overflow their columns.
-p, --path [EDB-ID] Show the full path to an exploit (and also copies the path to the clipboard if possible).
-t, --title [Term] Search JUST the exploit title (Default is title AND the file's path).
-u, --update Check for and install any exploitdb package updates (deb or git).
-w, --www [Term] Show URLs to Exploit-DB.com rather than the local path.
-x, --examine [EDB-ID] Examine (aka opens) the exploit using $PAGER.
--colour Disable colour highlighting in search results.
--id Display the EDB-ID value rather than local path.
--nmap [file.xml] Checks all results in Nmap's XML output with service version (e.g.: nmap -sV -oX file.xml).
Use "-v" (verbose) to try even more combinations
=======
Notes
=======
* You can use any number of search terms.
* Search terms are not case-sensitive (by default), and ordering is irrelevant.
* Use '-c' if you wish to reduce results by case-sensitive searching.
* And/Or '-e' if you wish to filter results by using an exact match.
* Use '-t' to exclude the file's path to filter the search results.
* Remove false positives (especially when searching using numbers - i.e. versions).
* When updating from git or displaying help, search terms will be ignored.

root@kali:~#
root@kali:~# searchsploit afd windows local
--------------------------------------------------------------------------------- ----------------------------------
Exploit Title | Path
| (/usr/share/exploitdb/platforms)
--------------------------------------------------------------------------------- ----------------------------------
Microsoft Windows XP - 'afd.sys' Local Kernel Denial of Service | ./windows/dos/17133.c
Microsoft Windows 2003/XP - 'afd.sys' Privilege Escalation (K-plugin) (MS08-066) | ./windows/local/6757.txt
Microsoft Windows XP/2003 - 'afd.sys' Privilege Escalation (MS11-080) | ./windows/local/18176.py
Microsoft Windows - 'AfdJoinLeaf' Privilege Escalation (MS11-080) (Metasploit) | ./windows/local/21844.rb
Microsoft Windows - 'afd.sys' Dangling Pointer Privilege Escalation (MS14-040) | ./win_x86/local/39446.py
Microsoft Windows 7 (x64) - 'afd.sys' Privilege Escalation (MS14-040) | ./win_x86-64/local/39525.py
Microsoft Windows (x86) - 'afd.sys' Privilege Escalation (MS11-046) | ./windows/local/40564.c
--------------------------------------------------------------------------------- ----------------------------------
root@kali:~#
root@kali:~# searchsploit -p 39446
Exploit: Microsoft Windows - 'afd.sys' Dangling Pointer Privilege Escalation (MS14-040)
URL: https://www.exploit-db.com/exploits/39446/
Path: /usr/share/exploitdb/platforms/win_x86/local/39446.py

Copied EDB-ID 39446's path to the clipboard.

root@kali:~#
SearchSploit requires either "CoreUtils" or "utilities" (e.g. bash, sed, grep, awk, etc.) for the core features to work. The self updating function will require git, and the Nmap XML option to work, will require xmllint (found in the libxml2-utils package in Debian-based systems).


MalQR - Collection of malicious QR Codes and Barcodes you can use to test the security of your scanners


MalQR is a collection of malicious QR codes and barcodes you can use to test the security of your scanners. It gives you the ability to conduct such tests with easiness : you just need to have a smartphone, a tablet or a laptop with an internet connection and browse MalQR.shielder.it to have a large collection of common payloads.

Currently it includes these codes standards:
This project is maintained by Shielder from an idea of smaury .